First Aid For Snake Bites
Tuesday, January 19, 2021
Tuesday, January 19, 2021

We have had some fantastic weather recently and it’s very likely that you’ve used it as an opportunity to get out and about amongst some of the incredible National parks that we have surrounding us. We all know, however, that when you go on a bush walk, you might be miles away from the next person, but you are certainly not alone!
Hidden in those bushes is a delightful array of creatures that, whilst not seeking you out specifically, may slither across your path and you could find yourself in a potentially dangerous situation should you happen to get bitten in the process.
As hard as it may be, the most important thing to remember if you find yourself in a situation where you or one of your party is bitten or stung, is to remain calm!
There are approximately 3000 snake bites in Australia every year and less than 20% of those will require anti-venom. Fatal bites are not very common, with only one or two each year causing death, the brown snake being the main culprit.
If you, or someone you are with is bitten by a snake:
By doing this, you could potentially wash away traces of the venom … It is extremely important that traces of the venom are retained so that they can be used with venom identification kits. Also, don’t try to suck the venom out (for the same reason).
It won’t help to cut the bite and if you apply a high tourniquet, it could make things worse – they are ineffective anyway and releasing them can be potentially fatal.
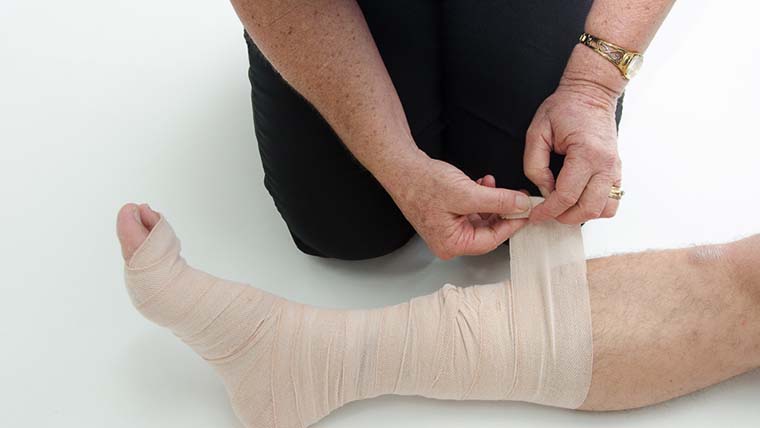
This involves applying a bandage to the area. It needs to have a firm pressure (about the same you would use for a sprained ankle). It shouldn’t be so tight that it restricts blood flow to the limb however. As shown in the video below, you should start the bandage at the entry point of the bite and bandage up the limb. For example, if the bite is on the ankle, you should bandage as far up to the hip as you can. This delays the spread of any venom.
It is then important to restrict mobility of the patient. While they are moving, they are increasing blood flow, which will help the venom to spread. This means that the patient should not walk or move a limb. Any transport should be brought to them where possible and bandages should not be removed until the patient is with medical professionals in a fully-equipped medical area.
(Mark the point of the bite on the bandage if you can so that they can cut just this part away and examine the bite without having to remove the whole bandage)
It is going to be a big help if you can identify the culprit responsible for the bite … obviously, do not get too close and taking a selfie is probably not appropriate but a mental note of any markings or characteristics that may help identify it could lead to the successful administration of the correct venom.
Check out all our First Aid courses.